You've just received your eagerly awaited favourite yarn in just the right colour for that great cardigan or sweater and can't wait to get knitting. But as with many high-quality things, before pleasure comes a duty, a little busywork. But one that gives you a chance to get familiar with your yarn before you start knitting: Winding the wool.
But why actually?
Wool in skeins
We deliver our wool in skeins, as this is also how it is dyed. Skein dyeing has the advantage that it is a little gentler and the fibres remain more elastic than with cone dyeing. This is because the yarn is wound onto cones and slightly stretched. With skein dyeing, however, the corresponding amount of yarn is loosely laid together and tied with a few threads so that it does not get tangled. This keeps the fibres elastic and the skeins are then just gently twisted together by hand, labelled and delivered. Before knitting can begin, the wool on the skein must be wound into balls so that the yarn does not get tangled during knitting.
But how exactly do I wind the wool?
First, cut the thread with the label. Then you can start by carefully taking the skein apart. It is twisted and one end is pushed into the other. Pull it out and twist it apart. Now lay it flat and spread it out into a circle or place it on a tool. This can be a swift or the back of a chair. A pouf or other large round cushion also works wonderfully.

You can also sit and put the skein around your knees or ask a loved one to hold it for you in the classic way with two hands. There doesn't have to be any tension on the yarn. It's just a matter of making sure that individual threads don't get from one side to the other or twist too much into each other.
Next, find the small securing threads that hold the skein together and unknot or cut them.

You will also find the beginning of your skein on the outside (and the end on the inside). Start winding with the beginning on the outside.

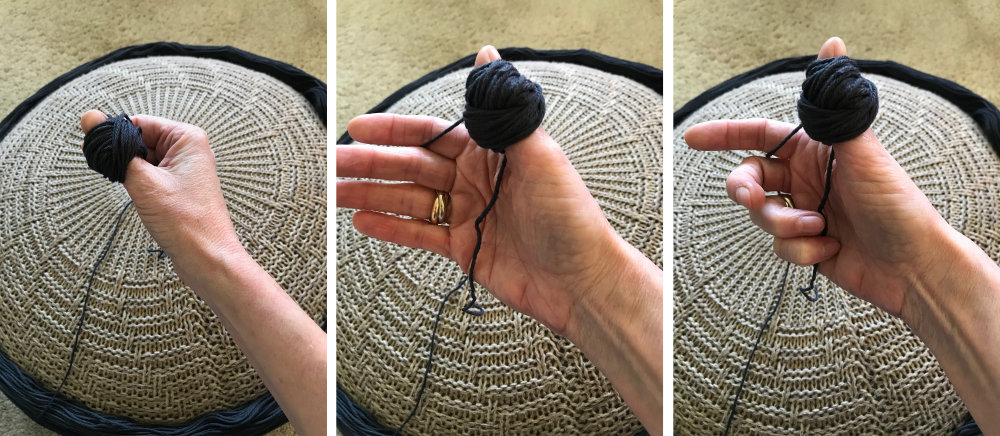
First wind the wool loosely around your thumb or three to four fingers a few times. (If you leave the beginning a little longer and hold it tightly in the palm of your hand the whole time, you can later use up your ball from the inside - very practical!)

Then always change direction again after a few turns so that your ball gets a round shape, and stay relatively close to the skein so that your thread can easily come out of the skein. After a short time, the small ball will appear.

It is important to wind the ball loosely and not to pull too hard on the wool so that the yarn retains its elasticity. Your ball of yarn should always be easy to squeeze when you press it together with your hand.

And if you don't want your balls of wool to roll away when you're knitting, you can just put them in a small bowl.
Useful helpers for frequent knitters
Swifts are available in various designs, for example in umbrella designs or with 4 winding arms, as standing winders or for clamping to a table or similar. However, they all work in the same way: the skein of yarn is placed around it and the reel is then stretched so that the skein does not slip. When winding, the reel rotates and allows the skein to be unwound without any problems.
For all impatient people or those who do not want to or cannot wind by hand, but also for large quantities, a ball winder is practical. Driven by a hand crank, it winds uniform, loose cakes of cylindrical shape in a short time. However, it should be used together with a swift to make it run smoothly.
You can see exactly how it works here, for example.
Winding philosophy
Some people wind all the skeins they need to knit the shawl, sweater or cardigan right at the beginning; others always wind when their skein runs out. How you go about it depends on your preferences and patience, and possibly also on the piece you are knitting.
In any case, winding is a wonderful opportunity to get to know your yarn and enjoy its softness and shimmer, and to get in the mood for the knitting ahead, as Cheryl Brunette describes in detail in her video.
